
Download and unpack the archive with the product
Each buyer receives an archive with the FXSTABILIZER trading robot by email after making a purchase. Download this archive to your computer and then unzip the archive. If you don’t have an archiver, use this free one – 7zip archiver.
Next – follow our instructions, in which you will learn how to install FXSTABILIZER on the platform and how to use it for automated trading.
Open the root directory of your MT4 platform
Open the root directory of your MT4 platform. To do this, in the upper left corner of your trading platform, click on the “File” menu. Select “Open data folder” from the drop-down menu.
Open the “MQL4” folder inside the root directory of your platform and find the “Experts” folder inside
Installing the DLL file
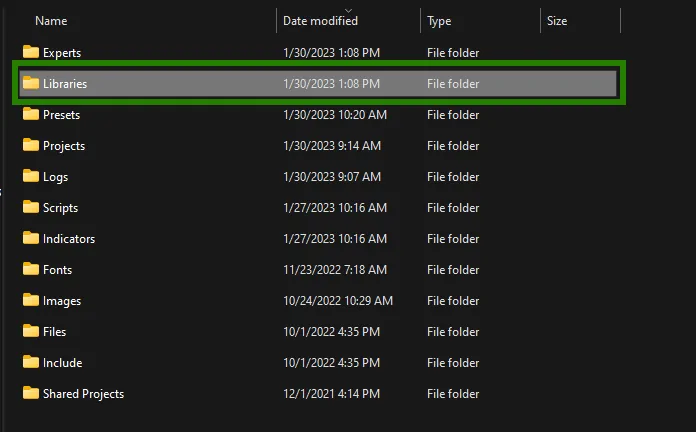
Inside the zip archive you will receive after purchase, you will find a DLL file. You need to copy this file to a “Libraries” folder which is located inside the “MQL4” folder in the root directory.
Restart your MT4 platform
This is necessary for any changes you make to take effect.
Assets for trading
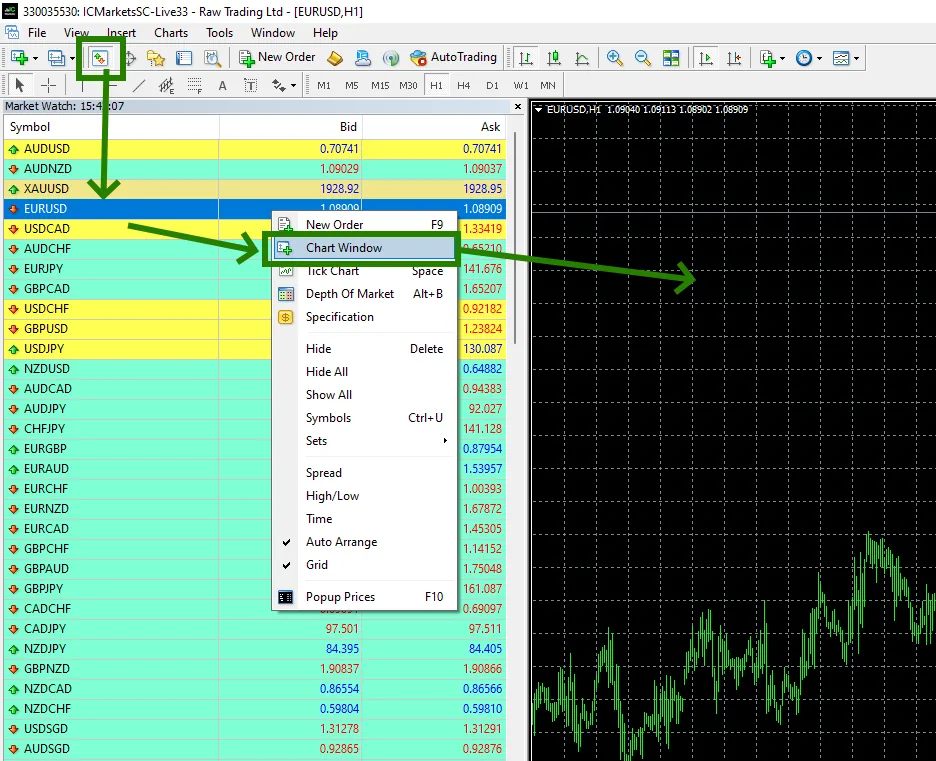
The main asset for FXSTABILIZER trading is the EURUSD currency pair. Also, the adviser works on other majors, however, it is best to use this trading robot on EURUSD. So, for this, go to the Market Whatch section and open the quotes chart of this currency pair.
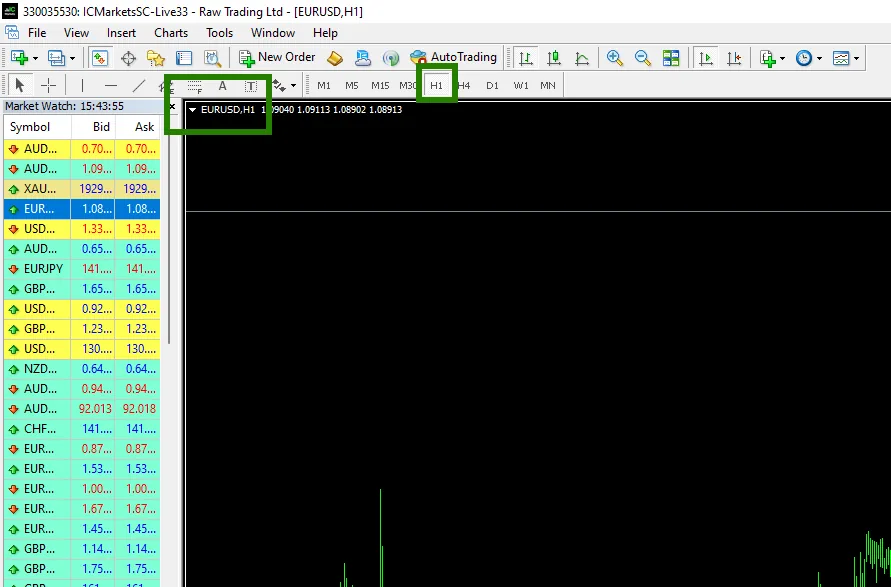
Set the timeframe H1 for the EURUSD quotes chart. Make sure that the H1 timeframe is displayed in the upper left corner of the quotes chart.
Activate the “Auto Trading” button:
Open the “Navigator” folder, find the FXSTABILIZER file in the “Experts” folder and drag it onto the EURUSD H1 quotes chart:
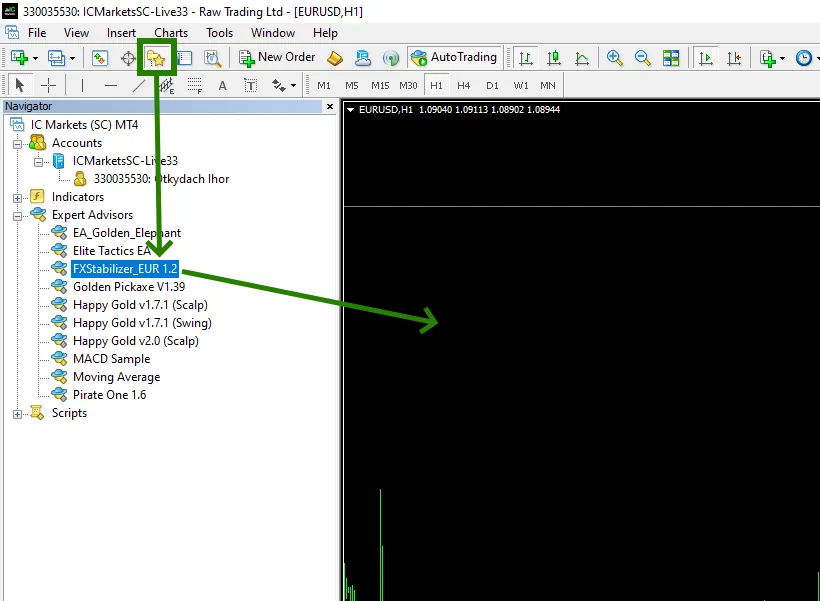
After that, the adviser will activate all trading services within a few seconds and will be ready for trading.